

My first (completed) project this week is a fabulous collection of animal pointer sticks that cost me next to nothing to make!! I was inspired by Greg @ Smedley's Smorgasbord of Kindergarten's Monday Made It from last week, and decided I needed to do this too! I have a few pointers already, but this just kicked it up a notch. They turned out SO CUTE!

All you need are wooden cutouts from any craft store, hot glue or another strong adhesive, and dowel rods. My wooden cutouts (.39 each) and dowel rods (.99 for a pack of 6) are from Joann's. (Plus 15% off for educators, people!)

Simply glue your dowel rod to the back of your wooden cutout and there you have it! I made sure to fill in all the cracks around my dowel rod to make sure they were as durable as possible for all that kinder love!


How cute are these, seriously?!?! You can store them in a milk crate like I have shown here, or just in a bucket as demonstrated below. I think these will be great not only for pointers, but also to incorporate into writing and dramatic play. I know they're going to just love these!

I have seen my next project on Pinterest many times and I finally decided to do it. It ended up being super easy, with the only downside being the time I had to wait between steps to let the letters dry.
All you need are some kind of wooden or sturdy cardboard letters, scrapbook paper of your choosing, Mod Podge (I used glossy), ribbon, a pencil, scissors/exacto knife, and hot glue.

Start by flipping your scrapbook paper over to the non-printed side, and lay your letters down to trace. Trace them with your pencil, and cut them out with scissors or an exacto knife.


Next, cover your wooden letter with Mod Podge and lay your paper cut-out letter on top. It should adhere instantly. Be careful to line up your actual letter and your paper letter very precisely! Don't worry about if some hangs over. You can use the exacto knife to trim the edges down if you wish when you're finished.


After you've adhered your paper on top, seal it in with two coats of Mod Podge on top of the letter. I like to let one coat of Mod Podge dry before putting on the second.

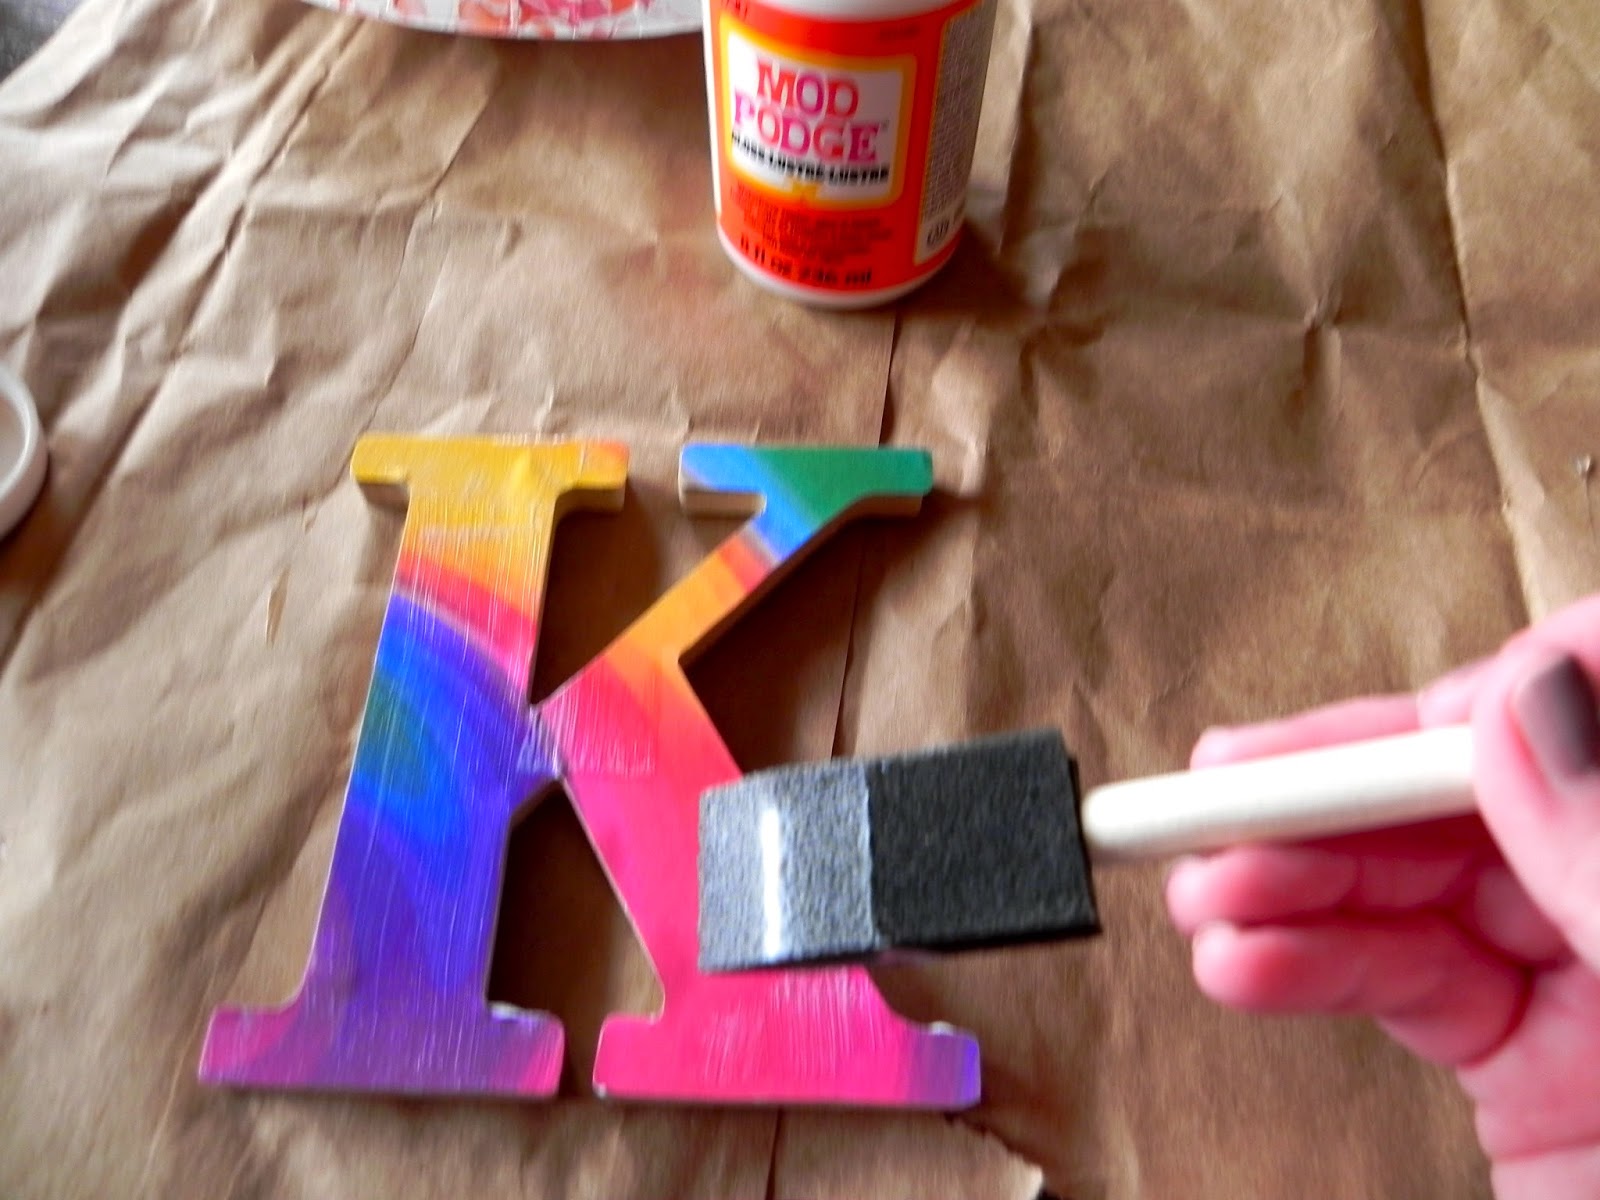
Once your letters are dry, it's time to put the ribbon on so that you can hang your letters. If you don't want to hang them, skip this step! Just put a little hot glue on the back of your letters and press the ribbon on the back.

Here is my finished project! Obviously I'm not going to hang these with Broncos clips as shown, but hey - you gotta improvise when you're at home! I picked a K and a D to hang outside of my classroom door. At my school, our classrooms are named by your grade level (K) and the first initial of your last name (D). I used to be 4D and now I'm KD, which also happens to be my initials :) Am I meant to teach kinder or what?? I will show y'all where their permanent home will be once I get in there and start movin' and shakin'!
What did you make for Monday Made It?? Link your project in the comments below!
Please follow my blog journey! I have LOTS and LOTS of great things to share in the coming weeks!! (I'm now on Bloglovin'!)
cheers!
Kelley


Super cute letters! I bought a "P" for preschool but didn't know what to cover it with or how. Thanks for inspiring me to make my P cute and fabulous! Do you do the picture of the kids with the letter on the first day of school? I see the idea on Pintrest all the time but have never tried it.
ReplyDeletewww.pocketofpreschool.blogspot.com
I made pointers this week, too! I made them for my daughter's classroom. She loved them and immediately said she could use them for a puppet show! Thanks for sharing!
ReplyDeleteCarol
Teachers Are Terrific!